
Case Study: CURVD Cliq Launch Campaign
On January 10th, 2025, I had the privilege of lighting and photographing a lifestyle shoot for Curvd. They make stylish earplugs, and their new Cliq system brings fashion to hearing protection. No more looking out of place when you need a break from noise.
Client and Team
Firetribe, an agency in northern Colorado, hired me for this project. Brandon Wasserburger, the owner and director, brought me on to lead the lighting and set design for both video and photography after connecting with Curvd through networking.

Pre-Production
First, I focused on creating a cohesive visual story. After getting the studio specs, I created a 3D model in Set.a.Light 3D, listed our available lighting equipment, and started planning.
After two weeks of collaboration between myself, Firetribe, and Curvd, we finalized our lighting diagrams. Here's how each set came together.
We created four abstract sets to give us flexibility during the shoot: a clean travel scene on white, a warm coffee shop setting with rich browns, a "night out" scene (which evolved due to logistics), and an energetic rave scene where we really pushed creative boundaries.
We worked with five models, though I had to plan the lighting without knowing their specifics beforehand.

Set 1: Travel
For this scene, we wanted to capture a solo traveler walking through an abstract airport terminal. Each scene needed to showcase how naturally the earplugs fit into different environments.
This was our simplest setup, using two large light sources positioned at 45° angles and placed far back to evenly illuminate the cyclorama wall. Despite limited space, we achieved the look we needed.


Set 2: Coffee Shop
We aimed to show someone using earplugs in a productive environment. Without the budget for a full set or location shoot, we created an abstract coffee shop atmosphere.
I blocked out the composition with a seated character, small table, and coffee cup. We originally planned to include a laptop but later simplified the scene.
Lighting Setup
For lighting, I wanted to create the feeling of a large window in front of the model and warm overhead lights. The challenge was making the white background appear brown—I had a clever solution.
The key light came from a 1x4' strip box, positioned tall and to her left at window height. This created a short-side shadow for a loop lighting pattern. While a window would typically be wider, a larger light source would have caused spill issues.
For the background, I placed another 1x4' strip box behind her to the left, adding a CTO (color temperature orange) gel. This created a warm highlight across her back.
Orange light naturally appears brown as it dims, so I used the inverse square law to my advantage. The spill from this light hitting our white background created the brown tone we wanted—achieving our look with just two lights!
However, the background wasn't as saturated as I wanted because the key light was spilling. Rather than moving the light back (which wasn't possible given our framing), I added a grid to focus the light just on the model and table. This let the background maintain its rich, saturated tone.
To complete the coffee shop feel, I added a gridded hard light on a boom above the model, aimed at her book. This created both a hair light and subtle bounce fill. Careful positioning prevented unwanted facial shadows while adding depth to the scene.
Since showcasing the earplugs was crucial, I used a projection light aimed directly at her ear to create a crisp highlight, cutting through the intentional shadows on her face.


Set 3: Night Out
This setup presented unique challenges: lighting a group while maintaining saturated background colors.
Group lighting requires more distance between lights and subjects, but this increases spill onto the background. We solved this using grids and careful light feathering to maintain quality in camera.
I used a horizontal 1x4' strip box with a grid mounted high, feathering the light away from the background to minimize spill while evenly lighting the group.
Two purple-gelled ambient lights at 45° angles illuminated the background.
A gridded, warm-gelled hair light added depth to the right side.
The main challenge was balancing group lighting with background saturation in limited space—a common issue as studio budgets shrink.
When we learned food and drinks weren't allowed on set, we had to adapt quickly. This actually simplified the scene by eliminating champagne glasses, though it required quick creative thinking.


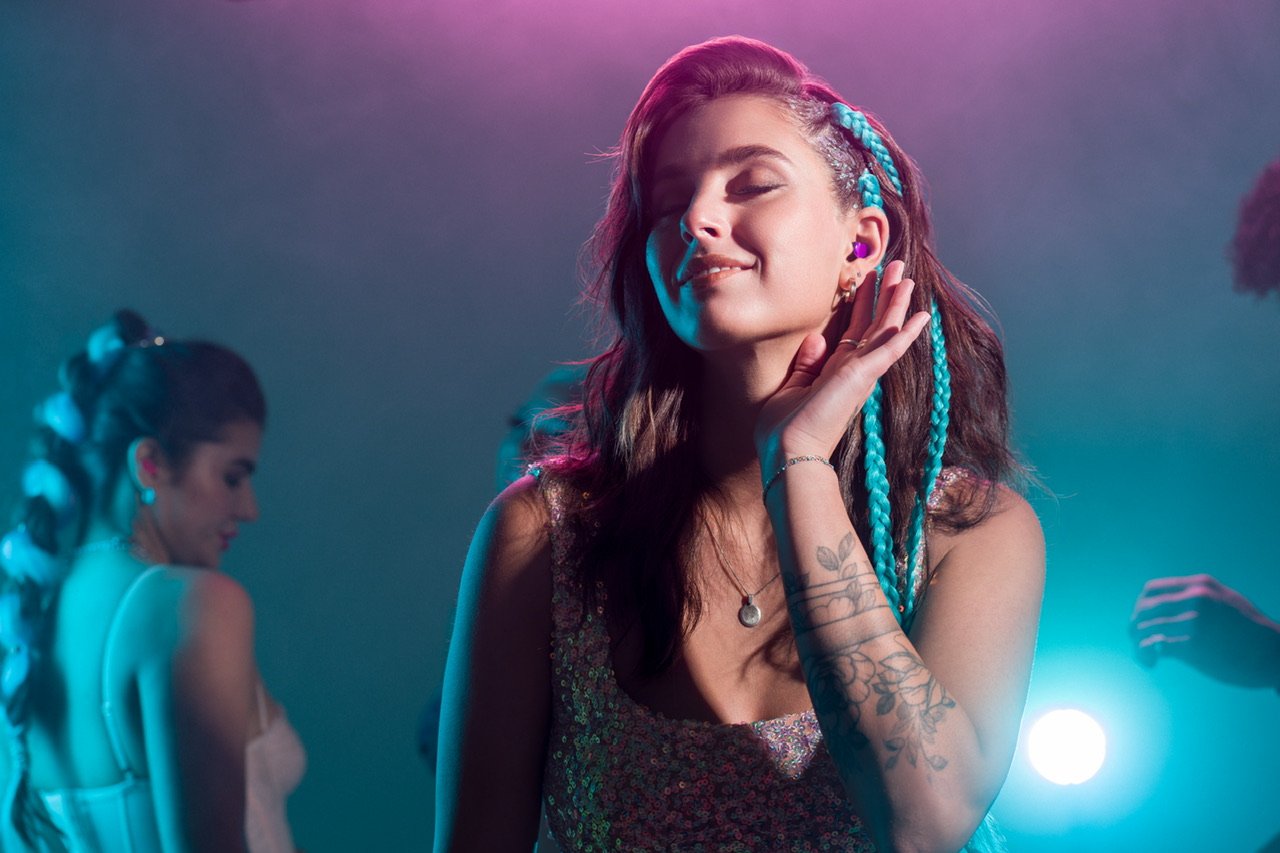
Set 4: Rave
This was our grand finale! We maximized our resources with all five models, pumping music, atmospheric haze, and striking makeup and wardrobe choices.
The lighting setup included a hard gridded key light on the right to control spill, a cyan-gelled fill light in a 1x4' strip box on the left, a pink-gelled hair light using another gridded 1x4' strip box, and a cyan-gelled backlight to illuminate the haze.
We photographed one model at a time with others in the background. With our previsualization locked in, we could focus on capturing authentic movement as the models danced to house music.


Results and Takeaways
Throughout the shoot, our focus was showing the earplugs in their natural environments. We carefully composed each shot to clearly show both the earplugs and faces. Using shallow depth of field meant precisely aligning eyes and ears in the focal plane.
While working within constraints, the shoot proved both challenging and creatively rewarding.
After several days of retouching and selecting final images, the client was thrilled with the results. You can see the photos in use now.
Connect
Thanks for reading this case study! If you like my work, I'd love to connect with you. You can find me at my website, Instagram, and YouTube.