
Don’t feel like reading? It’s okay, you can skip to the bottom of this article for a quick video I made.
Do you “thirst” to create stunning beverage photos? Do you want to “quench” your desire for beautifully styled drinks? Well you’re in the right place. In this article, I’m going to walk you through my process for nailing drink photography.
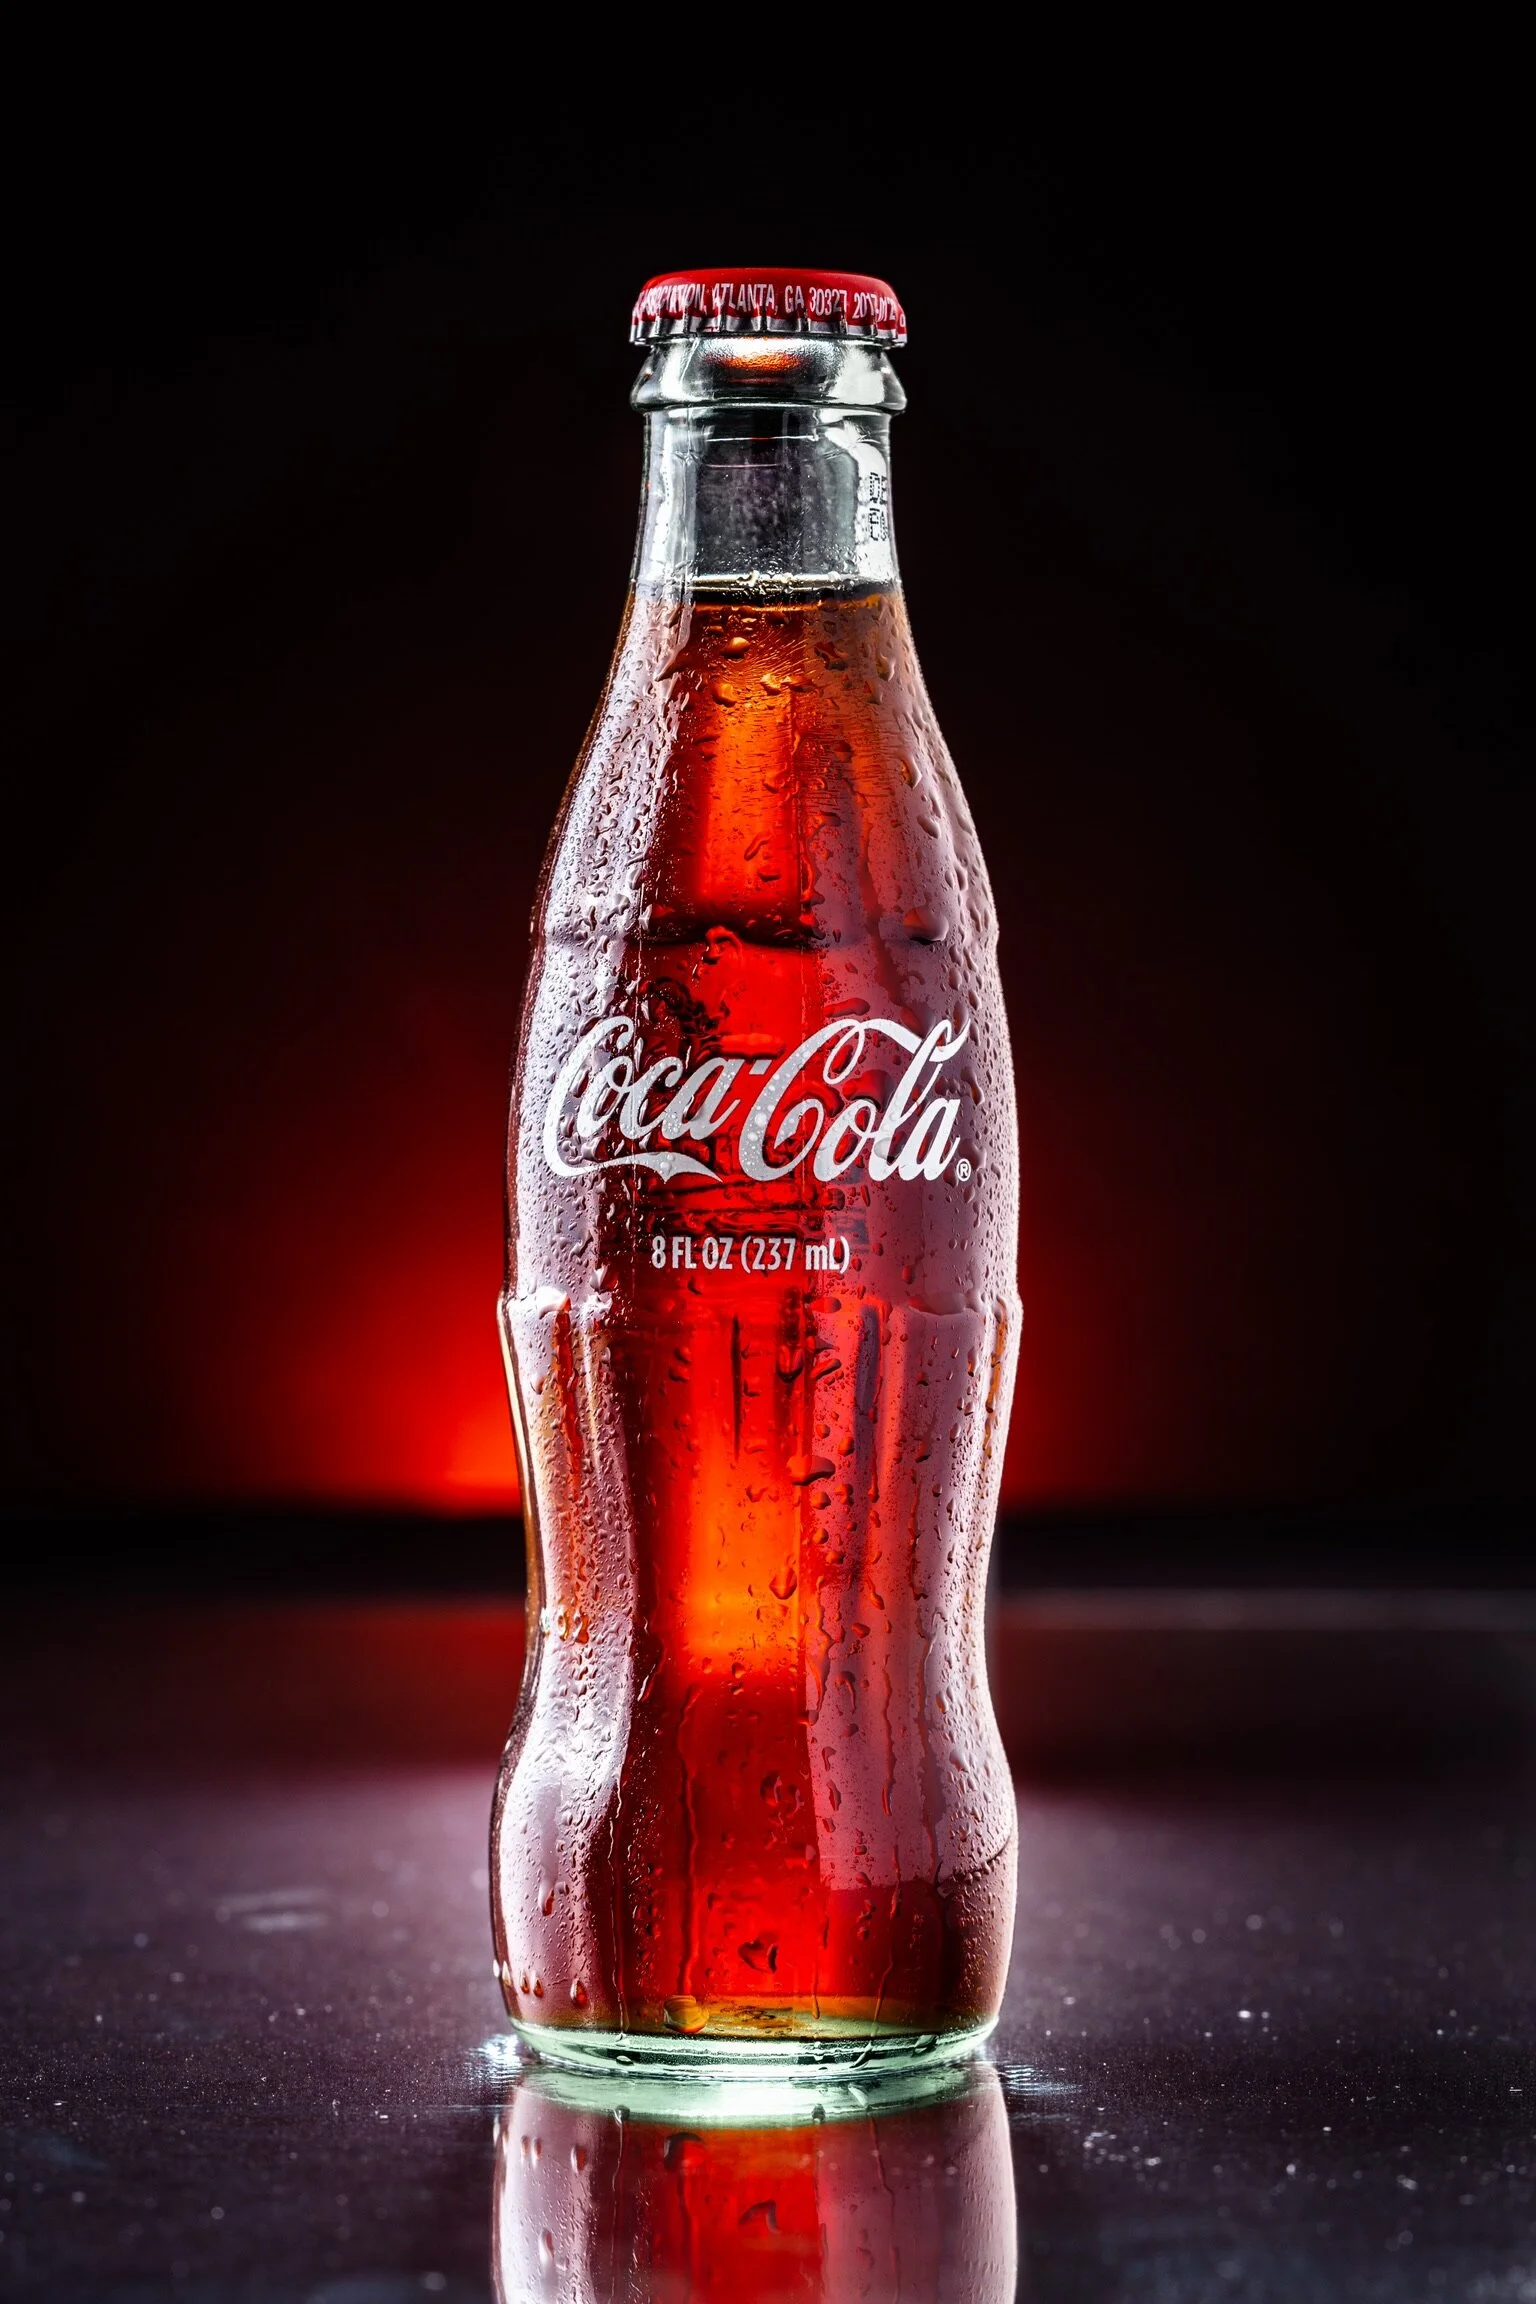
Lighting Easy as 1, 2, 3, 4…
As with everything, lighting is the most important ingredient for great beverage photos. In this example I’ll be using 3 lights and a fill for a total of 4 light sources, but feel free to pick and choose for your needs.
One way to add a splash of interest to your shot is lighting up the backdrop to compliment your scene. In this case, the label on the bottle is red so I wanted to match that.
I used a small RGB LED by Aputure but you can use whatever you have to get the look you want. I placed the light under the foam core “floor” to hide it from camera view.
The one light that really helps drink photos stand out is a back light. It makes the liquid glow through the glass and really shows off the contents and details. There will be odd refractions but we’ll address a way to fix that later.
I once again used a small Aputure MC and placed it about 12 inches behind the drink. A little brightness goes a long way and intensity will need to be adjusted depending on the light transmittance of the glass.
The key and fill are of course the most important lights in the scene. The key is a very large 4’x4’ diffusion panel lit by the Godox VL-150 and the fill is a large cut of foam core.
The idea with these lights is to position them so that the reflections run all the way up and down the edges of the bottle and land in a way that fits the labels nicely. With the fill, I specifically pushed it farther back into the scene to create a soft rim light on the right side of the bottle.
Note: If you don’t have access to a large soft box/diffusion sheet, there are lots of ways to get soft light. A good starting point is a large window with indirect sunlight. You can also buy white foam core super cheap almost anywhere and bounce a light source off of that. In fact, I find foam core to be way easier to use and more helpful than expensive alternatives for fill and bounce.
Ice Cold Styling
A plain bottle with no special coatings or effects can look decent with the right light, but if you really want to show off the texture and temperature of the beverage, you’ll want to add some extra love.
The industry standard way to make a drink look ice cold is to add fake condensation using vegetable glycerin. Mix 1 part water to 1 part glycerin in a fine mist atomizer and spray the front of your bottle with it. Remember that condensation doesn’t occur where cold liquid isn’t present.
The next effect I want to let you in on is a neat product called dulling spray. Krylon is a popular maker of this magic juice but fair warning, it’s very difficult to get ahold of as of writing this article. If you can’t find it, you can create a similar affect with frosted gels or diffusion paper taped to the back.
Dulling spray is a temporary aerosol matte finish designed to specifically create a frosted look. It’s used in many ways for photography but in this case, we are spraying it on the back of the bottle to diffuse the back light. This makes the liquid glow much more evenly without all the crazy refraction.
That’s It!
With a bit of creative editing, that’s really all there is to making some dope looking drink shots. If you have any questions please drop me a line and share your photos with me @jeahnlaffitte.
Happy Trails!
Here’s a quick video of the process.
60 Second Process Video
Want to work with me to create epic shots for your products? Hit me up at Contact page of this site.